

Choosing the Right Embroidery Thread for Military Hats
Table of Contents
- Start With the Hat, Not the Thread
- Polyester vs Rayon Embroidery Thread for Military Caps
- Why 40 Weight Embroidery Thread for Caps Is the Standard
- Embroidery Thread Color Selection for Uniform and Insignia Accuracy
- Hat Embroidery Needle Size and Machine Setup
- Matching Thread to Hat Construction and Embroidery Location
- Troubleshooting Thread Failures on Military Hats
- Frequently Asked Questions
Last Updated: October 9, 2026
Start With the Hat, Not the Thread
Choosing the right embroidery thread for military hats starts with the cap itself, not the spool. The fabric, structure, and where the design sits decide which thread will hold up. Most people pick a color they like and hope for the best. That is backwards.
At US Troop Gear, Inc., we build embroidered caps for every branch, so we think about this constantly. A structured cap with a stiff front panel behaves nothing like a soft, unstructured one. The wrong thread shows every flaw.
Here is the short version: embroidery thread is the fiber strand a machine stitches through fabric to form a design. Polyester, rayon, and cotton are the three main types, and each one behaves differently on a hat.
Get the hat right first. Then the thread choice almost makes itself.
Polyester vs Rayon Embroidery Thread for Military Caps
Polyester wins for military caps in most cases. It resists fading, holds up to washing, and handles the abrasion a cap takes on a daily basis. Rayon looks glossier but weakens when wet.
The trade-off is simple:
- Polyester: strong, colorfast, low sheen. Best for frequent wear.
- Rayon: high sheen, softer feel. Best for display or dress pieces.
- Cotton: matte finish, natural look. Best for a vintage or subdued style.
For a cap that gets worn in the field or washed often, polyester is the safe call. Rayon shines for a ceremonial look that rarely leaves the shelf. According to guidance on textile care from the American Cleaning Institute, the fiber content of a garment drives how it should be washed, which is exactly why thread choice matters for long-term wear.
When Cotton Thread Still Makes Sense
Cotton earns its place on subdued, matte designs where a soft look beats a shiny one. It also suits vintage-style patches and low-contrast logos. The catch: cotton fades faster and frays more easily under heavy abrasion. Use it for show, not for a cap that lives on your head.
Why 40 Weight Embroidery Thread for Caps Is the Standard
40 weight embroidery thread for caps is the default because it balances coverage and detail. It is thin enough for small letters and thick enough to cover fabric cleanly. Thread weight works in reverse: a higher number means a thinner thread.
For most cap designs, 40 weight is the right pick. Step up to a heavier weight only for large, bold shapes. Step down for tiny text that needs fine lines.
Embroidery Thread Color Selection for Uniform and Insignia Accuracy
Embroidery thread color selection comes down to one rule for military pieces: match the regulation, not your mood. Branch and insignia colors follow approved standards, and a close-but-wrong shade reads as sloppy. The hard part is not picking a color, it is knowing which standard applies to the piece you are making.
Start by sorting the job into one of three buckets, because each has a different color authority:
- Official uniform items and rank/insignia. Color, size, and placement are governed by the applicable service uniform regulation and the associated insignia specification. Treat the regulation as the source of truth, not a supplier's swatch card.
- Unit, morale, and commemorative caps. These are usually not governed by the same color standard as official insignia, so the unit or approving authority sets the palette. Get the color call in writing before you stitch a run.
- Civilian and replica caps. No uniform authority applies, so you are matching a reference photo or a customer's sample. Document the reference so reorders match.
Once you know the bucket, work the color in this order:
- Confirm the approved color name and, where a specification exists, the referenced color standard for that item.
- Match the thread to that color under daylight (around 5000-6500K), not indoor light.
- Decide contrast on purpose. High contrast pops; low contrast looks subdued.
- Record the exact thread brand, line, and color number so reorders stay consistent.
Color contrast changes the whole feel. A gold thread on dark fabric stands out. The same design in tone-on-tone thread reads as understated and official.
Two practical traps deserve their own note. First, metallic and high-sheen threads can read as non-regulation on subdued items even when the color is right, because the finish catches light. Second, thread lot drift means the same color number can arrive slightly different between production runs; buy enough of one lot to finish the job, and keep a stitched sample on file as your color reference for the next order.
Hat Embroidery Needle Size and Machine Setup
Hat embroidery needle size usually lands at 75/11 for caps, with a sharp point for woven fabrics and a ballpoint for knits. The needle, backing, and tension all work together. Get one wrong and the stitches suffer.
Set up your machine in this order:
- Choose the needle by fabric type.
- Add a backing that stabilizes the front panel.
- Set thread tension to match the thread and fabric.
- Test the design on scrap fabric first.
- Adjust stitch density before running the final cap.
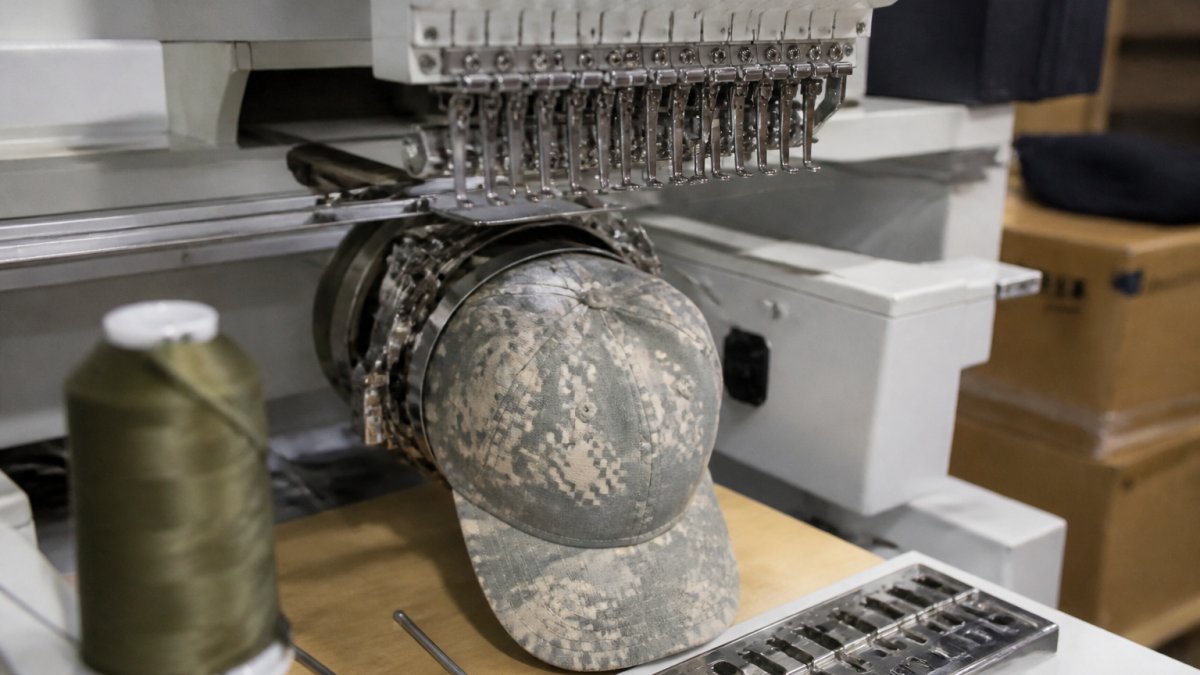
A tubular hoop lets you stitch a finished cap without flattening it. That matters on structured caps, where the front panel must stay rigid. For curved panels, slow the machine slightly to keep stitch quality even.
Matching Thread to Hat Construction and Embroidery Location
Thread selection by hat construction and embroidery location is where most people guess. A structured cap, a curved panel, and a soft crown each call for different handling. The location of the design matters just as much as the thread, because the same spool behaves differently over a stiff front panel than it does over a curved side panel.
Here is the construction-to-thread logic:
| Hat Type | Best Thread | Why |
|---|---|---|
| Structured cap (stiff front) | Polyester, 40 weight | Holds shape, resists abrasion, low sheen hides stitch irregularity |
| Unstructured cap (soft crown) | Polyester or cotton | Flexes with soft fabric without cracking or grinning |
| Curved panel (side/back) | Polyester, 40 weight | Even coverage on curves at reduced density |
| Dress or display cap | Rayon | High sheen for ceremony, rarely laundered |
| Field or daily wear | Polyester | Colorfast, washable, abrasion-resistant |
Structured crowns. The stiff front panel is a stable surface, so it tolerates higher stitch density and slightly heavier thread for bold coverage. The risk is the opposite of a soft cap: too much density on a stiff panel can pucker the buckram underneath, and the distortion shows because the panel cannot flex. Keep density moderate and let the thread do the coverage work.
Unstructured crowns. The fabric moves, so the thread has to move with it. A stiff, high-sheen thread on a soft crown can crack or grin when the cap is folded or stuffed in a pocket. Polyester's slight elasticity handles this better than rayon. Lower density and a lighter backing keep the cap from feeling boardy.
Curved panels (sides and back). Curves compress stitch spacing on the inside of the arc and stretch it on the outside, which is why side and back designs pucker more often than front designs. Drop density a step, slow the machine slightly, and use a backing that follows the curve rather than fighting it.
Seams and stiff fronts. Avoid placing dense designs directly over a seam or the edge of a stiff front panel. The needle has to punch through more layers, which raises breakage risk and distorts the design. If the placement is fixed, reduce density over the seam and add a small amount of backing to bridge the transition.
Placement changes the setup, not just the thread. High embroidery on the front panel needs stable backing and a tubular hoop that keeps the crown rigid. Side and back designs sit on curves, so keep density lower to avoid puckering. The construction decides the thread, and the location decides the density, backing, and machine speed.
Troubleshooting Thread Failures on Military Hats
Thread failures on hats almost always trace back to setup, not the thread itself. Breakage, fraying, and skipped stitches each have a known cause. Fix the cause and the symptom disappears.
Here is how to read the common problems:
- Thread breakage: tension too tight or a dull needle. Recheck both.
- Fraying: wrong needle type or a rough needle eye. Swap the needle.
- Skipped stitches: needle too small or a timing issue. Size up or service the machine.
- Puckering: too little backing or too much density. Add backing, ease density.
- Distortion: poor hooping or unstable fabric. Rehoop and stabilize.
For military caps that see frequent wear and washing, check care guidance from the Federal Trade Commission on textile labeling so your care instructions match the fiber. Proper care keeps thread performance strong for years, not months.
Frequently Asked Questions
What type of embroidery thread is best for military hats?
Polyester thread is the most reliable choice for military hats. It holds color under UV exposure, resists abrasion from repeated wear, and keeps its strength through washing. Rayon gives a brighter sheen for dress caps but fades faster and weakens when wet. If the cap will see daily duty or field use, polyester thread is the safer pick for durability and colorfastness.
Is 40 weight or 50 weight embroidery thread thicker?
40 weight thread is thicker than 50 weight. In the numbering system, a lower number means a heavier thread. For hat embroidery, 40 weight is the standard because it covers densely enough on structured and curved panels without building up too much bulk. Use 50 weight only for small lettering or fine detail where 40 weight would fill in the gaps of the design.
What size needle should I use for embroidering hats?
For most cap embroidery on woven or twill fabric, a 75/11 sharp needle works well with 40 weight thread. Switch to a 70/10 for fine detail or 80/12 if you are running heavier thread or dense designs. Ballpoint needles suit knits, sharp needles suit woven cap fronts. Always match the needle to both the thread weight and the hat fabric to reduce thread breakage and skipped stitches.
How do I choose thread colors that stand out on a military hat?
Start with the approved insignia colors for the branch and rating you are representing, then check contrast against the cap fabric. Dark thread on a dark cap disappears; light thread on a light cap washes out. For unit or ship crests, keep the palette tight, usually three to five colors, so the design reads clearly at arm's length. Test a sample stitch-out before committing a full run.
A cap that fades, frays, or puckers does not honor the service behind it. Getting the thread right protects the design and the meaning. At US Troop Gear, Inc., we build branch-specific caps with durable embroidered designs, from ship crests to military band gear, so your pride holds up wear after wear. Our focus on high-quality, durable gear means the details last. Continue shopping with US Troop Gear, Inc. and wear your pride with purpose.