

Essential Field Accessories for Wilderness Survival Explained
Quick Summary
Field accessories are the small tools that support a main wilderness kit, including cordage, fire starters, water containers, signaling devices, and navigation aids. Each solves a problem the larger items cannot, so a kit fails when small gaps are left unfilled. Prioritize accessories by your climate, terrain, and weight limits.
- Carry at least 30 feet of paracord, kept wrapped and ready for use.
- Pair a ferro rod with a striker for fire starting in wet conditions.
- Carry at least one durable water bottle plus a purification method such as tablets or a filter.
- Test your fire starter at home before leaving, since numb fingers can cause failure.
- Score each accessory on problem fit, reliability under stress, and weight before packing it.
Table of Contents
- Why Field Accessories Decide Whether a Wilderness Kit Works
- Cutting Tools and Cordage: The Core of Your Field Kit
- Fire, Water, and Shelter Accessories That Keep You Alive
- Navigation and Signaling Gear for Staying Found
- How to Prioritize Accessories by Climate, Terrain, and Weight
- Building a DIY Essential Field Accessories Kit
- Choosing an Outdoor Survival Gear List and Military Survival Gear List That Fit You
- Your Next Step: Assembling and Testing Your Field Kit
- Frequently Asked Questions
Why Field Accessories Decide Whether a Wilderness Kit Works
Most wilderness kits fail for a simple reason. The big items get all the attention, while the small field accessories that solve real problems get left behind. This pattern is common among people who have served and now want to be prepared outdoors. A good knife matters, but so does a way to start a fire when your hands are cold and wet.
Field accessories are the smaller tools that support your main gear. They include cordage, fire starters, water containers, signaling devices, and navigation aids. Each one does a job that the larger items cannot.
Here is the core idea. A kit is only as useful as its weakest link. If you carry a strong shelter but no way to signal for help, you have a gap. Filling those gaps with reliable accessories is what makes a kit work in real conditions.
Watch out: packing too many accessories adds weight fast. Every item should earn its place by solving a specific problem.
Cutting Tools and Cordage: The Core of Your Field Kit
A cutting tool and cordage form the foundation of most field setups. A knife lets you split wood, prepare tinder, and cut cord. Cordage lets you build shelter, hang gear, and secure loads.
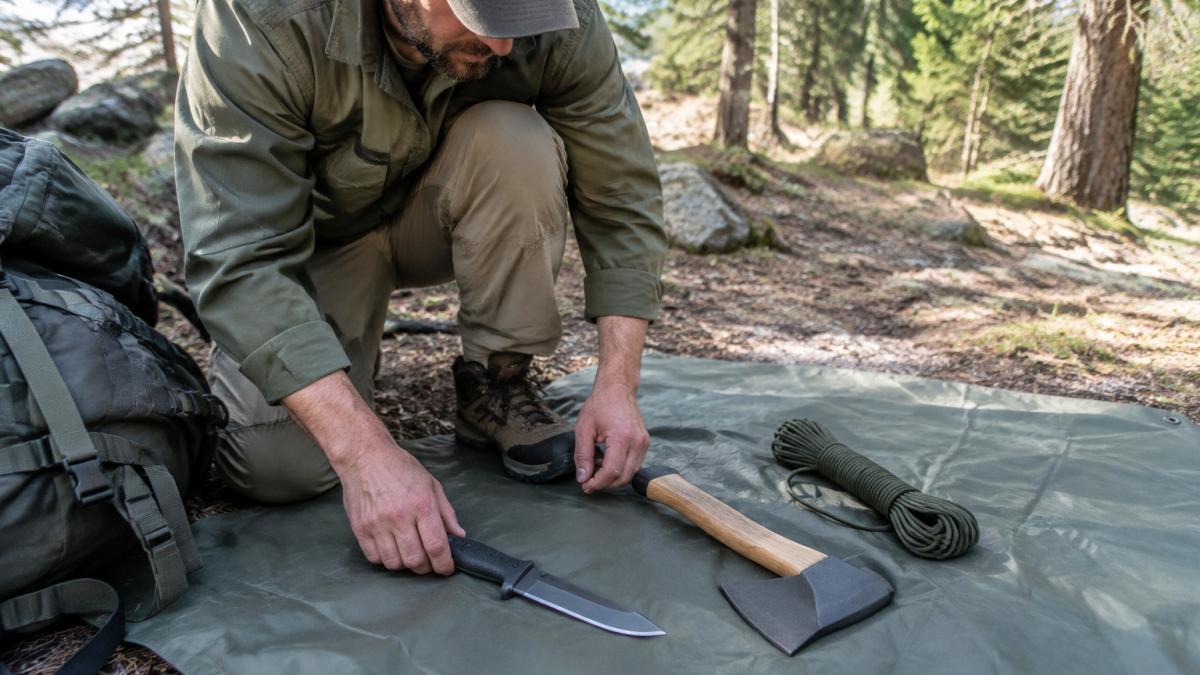
For cordage, many people choose 550 paracord because it is strong, light, and easy to find.
Key items to consider:
- A fixed-blade knife with a full tang for heavy tasks
- A folding saw or small hatchet for larger wood
- At least 30 feet of paracord, kept wrapped and ready
- A sharpening stone to keep the edge working
A common mistake is buying a knife that looks tough but has a thin, weak blade. Test the fit in your hand before you commit. A knife you cannot control is more dangerous than no knife at all.
The article lists the core items to consider for a field kit, along with the key figures it gives.
| Item | Value | Note |
|---|---|---|
| Cordage | At least 30 feet | Keep wrapped and ready |
| Cordage type | 550 paracord | Strong, light, easy to find |
| Knife | Fixed-blade, full tang | For heavy tasks |
| Folding saw or hatchet | Larger wood | For bigger wood |
| Sharpening stone | Keeps edge working | Maintains the blade |
Fire, Water, and Shelter Accessories That Keep You Alive
Fire, water, and shelter are the three needs that matter most in the first hours of a survival situation. Accessories in these areas give you the most return on weight.
For fire, a ferro rod paired with a striker is a common choice for wet conditions.
For water, carry at least one durable bottle plus a purification method such as tablets or a filter. Boiling works too, but only if you have a pot and fuel.
For shelter, an emergency blanket and a tarp weigh little and cover a lot of need. Add a trash bag as a backup layer against rain.
Watch out: test your fire starter before you leave home. A ferro rod that works in your garage can still fail when your fingers are numb.
Navigation and Signaling Gear for Staying Found
Staying found matters as much as staying warm. A compass and a paper map, along with the skill to use them, prevent most wilderness emergencies from getting worse.
For signaling, a loud whistle carries farther than your voice. A headlamp with a red light setting can help you move at night without losing your night vision.
Navigation and signaling checklist:
- Compass with a clear baseplate
- Waterproof map of your area
- Whistle attached to your pack strap
- Signal mirror stored where you can reach it fast
- Headlamp with spare batteries
Practice with these tools before you need them. A compass is only useful if you know how to set a bearing.
How to Prioritize Accessories by Climate, Terrain, and Weight
Most gear lists treat every accessory as equally important. In practice, the right priorities shift with the environment you will be moving through, and the same item can be essential in one setting and dead weight in another.
Start by identifying the single most likely way your trip goes wrong in that environment. Then ask which accessories address that failure mode most directly.
Cold, wet, forested terrain (for example, the Pacific Northwest in autumn): Hypothermia is a major risk in these conditions, and it can develop faster when clothing is damp (Cold Weather and Travel | Travelers' Health).
Hot, dry, open terrain (for example, the desert Southwest in summer): Dehydration and heat exhaustion lead the risk list. Water carrying capacity and a purification method rank above fire. A wide-brim hat, a sun-reflective emergency blanket used as a shade canopy, and electrolyte supplements earn their place.
High-elevation or alpine terrain: Weight is the constraint that governs everything else, because elevation gain is physically demanding and temperature swings can be severe.
Once you have your environment-specific shortlist, consider each accessory against three questions:
- Problem fit: Does it solve a failure mode you are realistically likely to face in this environment? An item that solves a rare problem should be carried only if its weight is negligible.
- Reliability under stress: Will it still work with cold hands, wet conditions, or fatigue? A simple, mechanical item often beats a more capable electronic one.
- Weight and volume cost: What does it add to the pack, and does it do more than one job? A pot that boils water and also serves as a cup can be more useful than a single-purpose item of similar weight.
Items that score high on all three belong in the pack first. An item that scores high on problem fit but low on reliability should be replaced with a sturdier option or backed up by a second method. An item that scores low on problem fit should be cut, however appealing it looks.
Watch out: the most common error is adding accessories for an environment you are not actually visiting. Build the kit for the trip you are taking, then adjust only when you learn something new from experience.
Building a DIY Essential Field Accessories Kit
A homemade kit lets you match every item to your own environment, body, and skill level, which pre-assembled survival kits rarely do. The process is less about buying the right things and more about testing, maintaining, and building in redundancy.
Begin with the container. It should keep contents dry even if submerged briefly, and it should be organized so you can locate any item by feel.
Next, build the kit in layers, testing each layer before adding the next:
- Core tools: A cutting tool and roughly 30 feet of cordage. Before packing, confirm the knife can be opened and used with gloves on, since dexterity drops quickly in cold conditions.
- Two independent fire methods: Choose two that work differently, such as a ferro rod and waterproof matches. Practice each one at home until you can produce a flame within a set number of attempts, ideally with cold or damp hands.
- Water handling: At least one durable container plus a purification method. Tablets are light but slow, while a filter is faster but needs maintenance. Carry a method that works even if your primary method fails.
- Signaling and navigation: A whistle, a signal mirror, a compass, and a map of your area. Learn to take a bearing with the compass before relying on it.
- Shelter and warmth: An emergency blanket and a tarp, plus one extra insulating layer sized for the coldest conditions you expect.
- Repair and backup: A small repair kit with needles, thread, duct tape wrapped around a card, and spare batteries or a small power source for the headlamp.
Adapt the kit to the user. Someone with limited grip strength may need larger, easier-to-operate fire starters and a knife with an ergonomic handle. Someone with a smaller pack capacity should prioritize the two highest-value items in each category and accept fewer backups.
Test the finished kit in the conditions you expect. Take it on a day trip, use every item at least once, and note anything that failed, felt awkward, or was missing when you needed it.
Watch out: a kit that has never been used under stress often fails on its first real outing. Practice the skills that go with each item, not just the item itself, and carry the knowledge to use it as well as the gear.
Choosing an Outdoor Survival Gear List and Military Survival Gear List That Fit You
A ready-made outdoor survival gear list or military survival gear list can save time, but only if it matches your needs. Many lists include items you will never use in your region.
When comparing lists, look for these features:
- Items that match your climate and terrain
- Clear weight and size information
- Durable materials that handle repeated use
US Troop Gear, Inc. offers branch-specific apparel and embroidered caps inspired by real heroes, with a focus on quality and purpose, so you can connect your service history to your outdoor goals.
Your Next Step: Assembling and Testing Your Field Kit
Gather your accessories, pack them, and test each item in a safe setting. Practice fire starting, cordage knots, and compass bearings before your first trip.
Your field kit is only ready when you trust every item in it. Start with the basics, test them in real conditions, and upgrade as you learn what you actually need. Explore the branch-specific apparel and challenge coins at US Troop Gear, Inc. and find the pieces that fit your mission.
Frequently Asked Questions
What are the top 10 items needed for survival in the wilderness?
The core items usually include a cutting tool, a fire starter with tinder, cordage, a water bottle or hydration system, a water treatment method such as purification tablets or a filter, a compass and map, a signaling device such as a whistle or signal mirror, a headlamp, a first aid kit, and emergency shelter with extra insulation. Prioritize them by the environment you expect. In cold, wet terrain, insulation and fire rank higher. In hot, dry terrain, water carries the most weight. Build the list around the threats you are most likely to face, then add redundancy for the items that fail most often.
What should be in a basic wilderness survival kit?
A basic kit should cover the essentials that keep you warm, hydrated, found, and able to signal for help. Start with a fixed-blade knife, a fire starter such as a ferro rod with waterproof tinder, 550 paracord, a leakproof water bottle, and a purification method. Add a compass, a printed map of your area, a whistle, a headlamp with spare batteries, and a small first aid kit. Include an emergency blanket or bivy and a warm hat. Store everything in a watertight case so the kit stays dry and usable.
Which field accessories are most useful for finding and purifying water?
Purification tablets or a filter are the most practical choices for most people, and a durable, leakproof water bottle is the container that makes them work. Chemical tablets are light and reliable but need time to act. Filters are faster but add weight and need maintenance. A collapsible container helps you carry water from a source. Pair these with a small pot or heat source for boiling if your filter or tablets run out. Practice using whichever method you carry before you need it.
How do you choose survival gear for a day hike?
For a day hike, carry a lighter version of your full kit. Focus on water, a headlamp, a whistle, a compass, a map, a small first aid kit, an emergency blanket, and a fire starter. Add a warm layer and a rain shell regardless of the forecast, since weather changes quickly in the backcountry. Choose items based on how long you could be stranded and how far you are from help. A knife and cordage are useful but less critical on a short, well-marked trail.
