

How to Display Military Unit Hat Collections
Table of Contents
- Planning Your Military Hat Display: Layout, Space, and Handling
- Military Hat Display Ideas for Walls, Shelves, and Rooms
- Choosing a Military Hat Rack for Quick Access and Rotation
- How to Organize a Hat Collection by Unit, Rank, and Era
- Using a Military Cap Display Case or Shadow Box for Protection
- Displaying Patches, Badges, and Insignia Alongside Your Caps
- Preserving Military Hats: Dust, Light, and Environmental Control
- Conclusion: Display Your Unit Hat Collection with Pride
- Frequently Asked Questions
Last Updated: October 6, 2026
Planning Your Military Hat Display: Layout, Space, and Handling
Learning how to display military unit hat collections starts with one honest question: how much room do you actually have?
Sort your headgear into three groups: caps you wear, caps you rotate for events, and caps that stay on display.
Measure your wall or shelf space before you shop. Then note three things:
- Sunlight exposure through the day
- Humidity levels in the room
- Traffic, so hats do not get knocked off
Handle every cap by the brim or crown, never the emblem, hand oils dull embroidery over time. Wash your hands first, or wear cotton gloves for older pieces.
Military Hat Display Ideas for Walls, Shelves, and Rooms
The best military hat display ideas match the room, not the other way around. A home office wall suits a row of caps on a rail; a living room shelf works better with one or two framed pieces; a dedicated "war room" can carry a full themed wall.
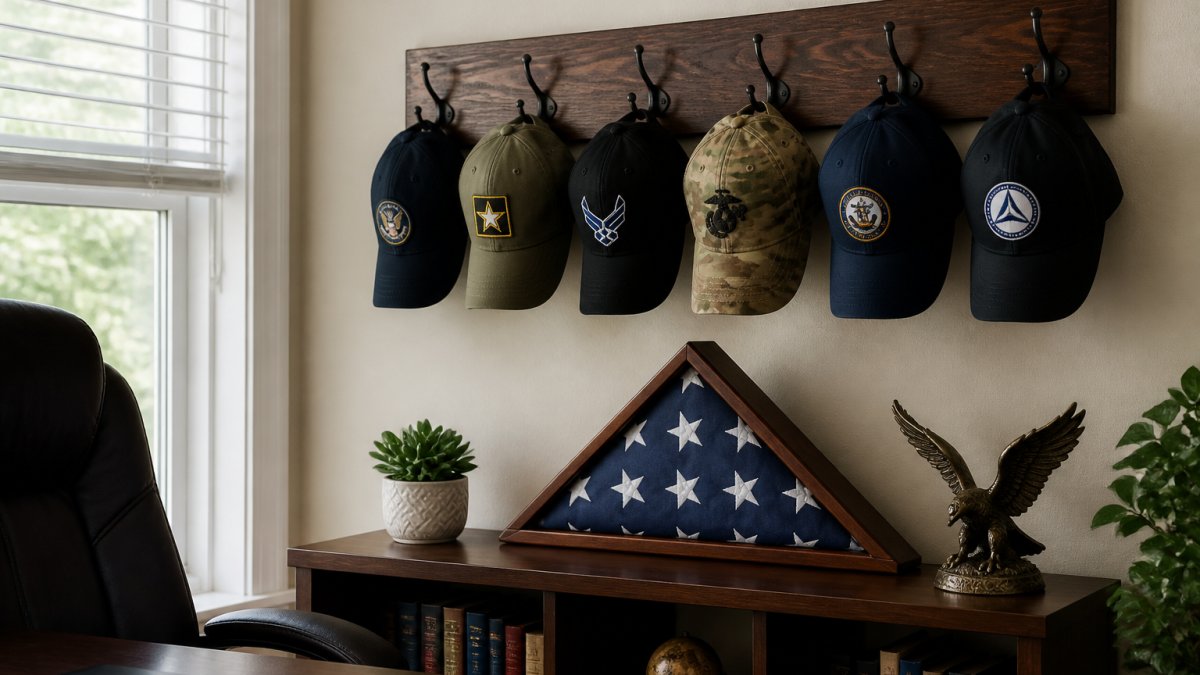
Wall displays: spacing and height
A standard ball cap is roughly 7 to 8 inches wide at the crown.
Hang the bottom row so brims sit at roughly eye level, about 60 to 66 inches from the floor, keeping emblems in the natural sightline.
For a single rail, use a continuous wooden or metal strip screwed into at least two wall studs. For individual hooks, space them on the same 9-to-10-inch centers.
Shelf displays: stands and depth
On a shelf, each cap should face forward on its own stand rather than lying flat, which lets the crown relax and the brim curl. Small acrylic or wire stands hold the crown upright and angle the front panel toward the viewer.
A typical 12-inch-deep shelf fits one row of caps on stands. For two rows, raise the back row on a riser so the front row does not block the emblems.
Room-by-room layouts that work
- Home office: One rail, chronological order, 6 to 10 caps.
- Living room: One or two framed or cased pieces on a shelf, fewer pieces, more weight per piece.
- Dedicated display room: A full themed wall grouped by branch or era, with a rail for the main run and a shelf for oversized or dress headgear.
Mounting hardware by wall type
Match the anchor to the wall:
- Drywall with a stud behind it: Use a wood screw long enough to bite at least 1 inch into the stud.
- Drywall with no stud: Use a hollow-wall anchor rated for the load. A rack holding 10 caps plus the rack can run 5 to 10 pounds, so choose an anchor rated well above that.
- Plaster or lath: Drill a pilot hole first to avoid cracking, then use a toggle-style anchor.
When in doubt, spread the load across two mounting points. A single hook in drywall is the most common failure point in home hat displays.
Hat-specific mounting that keeps shape
How you attach the cap matters more than where. Support the crown without pinning or gluing fabric.
- Ball caps: Rest on a curved peg or wide, rounded hook so the crown keeps its dome. A narrow hook dents the front panel over time.
- Structured or dress caps: Support the crown from inside with a foam or tissue form, then rest on a flat shelf or wide cradle. Do not hang a heavy dress cap by the brim.
- Campaign hats and wide-brim styles: These need a flat surface or purpose-built cradle; hanging by the brim warps it over months.
Never glue, pin, or staple through fabric or embroidery. Removable clips, foam forms, and cradles hold the cap without leaving a mark.
Choosing a Military Hat Rack for Quick Access and Rotation
A military hat rack is the workhorse of any collection, holding the caps you wear or rotate often and keeping them shaped between wears. A rack that lasts comes down to peg shape, material, and mounting.
Peg and hook shape
For ball caps, look for curved pegs or wide, rounded hooks. The curve matches the inside of the crown, so the cap rests naturally instead of hanging from a single point. Narrow hooks and thin wire pegs dent the front panel over time.
For dress or structured caps, flat cradles or wide shelves work better than pegs, the cap sits on its base rather than hanging, which protects the shape.
Material trade-offs
- Wood: Warm look, easy to stain or paint, gentle on fabric. Heavier, and it can warp in damp rooms.
- Metal: Slim, strong for its weight, easy to wipe clean. Cheaper metal can have sharp edges that snag embroidery, check the finish before loading.
- Wire: Light and inexpensive, good for a closet or behind a door. The thin gauge is least forgiving on crown shape, so reserve it for caps you wear often and replace cheaply.
Sizing a rack to your collection
Count the caps you actually rotate, not the ones you own. A rack sized for 10 when you rotate 20 means stacking, and stacking flattens crowns.
As a rule of thumb, allow 4 to 5 inches of rack width per ball cap on a peg rack, and 9 to 10 inches per cap on a flat shelf. A 30-inch peg rack holds 6 to 7 ball caps.
Installing a wall-mounted rack
- Decide the height. For a daily-use rack, put the top row at about 66 to 72 inches from the floor so you can reach it without a step stool.
- Find the studs. Use a stud finder, or knock along the wall until the sound changes from hollow to solid. Mark the stud centers.
- Mark your mounting holes. Hold the rack against the wall, level it, and mark through the mounting holes.
- Drill pilot holes. A pilot hole slightly narrower than your screw keeps wood from splitting and drywall from crumbling.
- Anchor and screw. Into studs, use wood screws long enough to bite at least 1 inch. Into drywall with no stud, use hollow-wall anchors rated well above the loaded weight.
- Load and check. Hang a few caps, then gently press down on the rack to confirm it is solid before loading the rest.
Freestanding and door-mounted options
Freestanding racks work in closets or behind a door where wall space is tight, and they are easiest to move when you rearrange. Door-mounted racks save floor and wall space but add weight to the door, so check the hinge side and avoid overloading. If you rotate caps for events, keep the rack near where you get ready.
How to Organize a Hat Collection by Unit, Rank, and Era
The cleanest way to organize a hat collection is to pick one primary system and stick with it.
Your three main options:
- By unit: Group all 2nd Armored Division or 9th Infantry Division pieces together. Best for collectors with deep ties to one or two units.
- By rank: Order from junior enlisted to officer. Works well for shadow boxes and formal displays.
- By era: World War I, World War II, Cold War, and modern. Best for historical collections.
Label everything. A small card with the unit, years, and any story behind the cap adds context for guests and future family members.

If your collection spans multiple units, consider our 2nd Armored Division Cap or the 4th Infantry Division Cap as anchor pieces for a unit-focused wall.
Using a Military Cap Display Case or Shadow Box for Protection
A military cap display case or shadow box protects your most valuable pieces from dust, light, and handling. Use one for anything rare, sentimental, or fragile.
Shadow boxes work best for one to three caps plus patches, badges, and a photo or two.
What to put in a shadow box:
- One or two caps as the centerpiece
- Unit patches and rank insignia
- A name tape or service photo
Mount caps on a small hidden stand inside the box so they sit upright. Do not glue or pin through fabric.
Displaying Patches, Badges, and Insignia Alongside Your Caps
Patches, badges, and insignia turn a hat display into a story. Arrange them to support the caps instead of competing with them.
Group related items together. A unit patch, rank insignia, and combat badge from the same service period should sit near each other.
For wall displays, mount patches on a felt or canvas backing board. Use archival-safe adhesive dots or stitch them to the backing.
Preserving Military Hats: Dust, Light, and Environmental Control
Preservation decides whether your collection lasts another 40 years.
Three enemies do the most damage:
- Dust: Settles into embroidery and wool. Cover open displays with a light dust cloth or use enclosed cases.
- Light: UV rays fade fabric and thread. Keep displays out of direct sun. Rotate pieces that sit near windows.
- Humidity: Damp air invites mold and rust on metal insignia. Keep rooms between 60 and 70 degrees Fahrenheit with steady, moderate humidity.
Store off-display caps in acid-free boxes with tissue padding inside the crown, away from basements and attics. Check stored pieces twice a year for pests and moisture.
Conclusion: Display Your Unit Hat Collection with Pride
Building a display that honors your service takes planning, the right rack or case, and a habit of care.
At US Troop Gear, Inc., we stock branch-specific caps built to last, from unit caps like our 9th Infantry Division Cap and 2nd Armored Cavalry Regiment Always Ready Cap to embroidered designs inspired by real heroes.


Continue shopping with US Troop Gear, Inc. and display your unit hat collection with the pride it earned.
Frequently Asked Questions
How can I display military unit hats without damaging them?
Avoid direct sunlight and use UV-filtering glass or acrylic in display cases. Support the crown of each cap with acid-free tissue or a foam insert so the brim doesn't bear the weight. Keep hats away from damp basements and hot attics. For a military hat display, rotate caps on a rack every few months to limit light exposure. Dust with a soft brush. These steps protect fabric, embroidery, and shape over time.
Should military hats be displayed in a shadow box or on a hat rack?
Shadow boxes suit one or two special caps that need full protection from dust and light. A military hat rack works better for a larger, rotating collection you want to see and access daily. Many collectors use both: a rack for everyday viewing and a military cap display case for a prized unit hat. Match the method to how often you handle the cap and how much space you have.
How do you arrange a military hat collection by unit or branch?
Start by grouping caps by branch, then by unit within each branch. For example, keep all Army caps together, ordered by division number or regiment. You can also sort by era, placing World War II and Cold War caps in separate sections. Label each section with a small card noting the unit and years. This makes your military hat display easy to update and helps visitors follow the history.
What information should I include on labels for military unit hats?
Include the full unit name, branch, years of service if known, and any personal connection, such as 'Served 1985-1989.' Add the conflict or era if relevant. For caps with patches or insignia, note what each symbol means. Keep labels short and printed on acid-free card stock. Good labels turn a military hat display into a small history exhibit and help preserve the story behind each cap.