

How to Build a Personalized Military Shadow Box?
Last Updated: October 29, 2026
Quick Summary
A personalized military shadow box combines medals, unit patches, a folded flag, challenge coins, and a name plaque in a glass-fronted case. Start with one centerpiece item, then arrange supporting pieces around it using a paper mock-up. Keep the display to one service's look and mount every item with archival materials.
- Keep one branch's look and avoid mixing too many branch symbols in one box.
- Choose one centerpiece item, such as a flag, cap, or key medal, before planning the layout.
- Aim for 7 to 12 items and leave 1 to 2 inches of margin from the case edge.
- Never use hot glue, superglue, or double-sided tape on medals, ribbons, or flags.
- Hang the box on an interior wall away from direct sun and humid rooms.
Table of Contents
- Personalized Military Shadow Box Ideas by Branch and Service
- Military Shadow Box Items to Include and What to Skip
- Step-by-Step: Planning and Assembling Your Shadow Box
- Military Shadow Box Layout Templates and Arrangement Tips
- Writing a Military Shadow Box Plaque Wording That Honors Service
- Budget, Preservation, and Mounting Tips for Long-Term Display
- Choosing Your Starting Pieces for a Custom Display
- Frequently Asked Questions
A personalized military shadow box is one of the most meaningful ways to honor a service member's career. Whether for a retirement gift or preserving your own service history, the right mix of medals, patches, and a name plaque turns scattered keepsakes into a lasting tribute.
A shadow box is a shallow, glass-fronted case that holds flat or small items in a layered arrangement. Integrating these varied depths allows for the inclusion of handmade memory items that anchor the narrative of a service career within the display.
Personalized Military Shadow Box Ideas by Branch and Service
Every branch has its own look, colors, and symbols, so the design should start with the service.
Ideas for Army, Navy, Air Force, and Marine Corps Designs
- Army: Dark background with the unit crest, rank insignia, and a combat or service ribbon row. A retired Army cap can serve as the centerpiece.
- Navy: Ship crest or ship name, paired with a Navy officer cap and a USS ship challenge coin.
- Air Force: Blue-toned backgrounds with wings, squadron patches, and a retired flag.
A common mistake is mixing too many branch symbols in one box. Stick to one service's look so the piece tells one clear story.
Ideas for Retirement and Recognition Gifts
Retirement is a natural occasion for a shadow box. Here are three approaches that work well:
- Career timeline: Arrange items left to right, from first unit to final assignment.
- Ship or unit focus: Build around one ship or unit with its coin, crest, and a photo from that tour.
- Honor the rank: For a Navy chief, include a chief-themed recognition piece alongside the core medals.
Military Shadow Box Items to Include and What to Skip
Start with items the service member earned or wore, then add personal touches.
Strong candidates to include:
- Medals and ribbons earned during service
- Unit insignia and shoulder patches
- A folded retired flag
Items to skip or handle with care:
- Duplicate medals that add clutter
- Fragile, brittle, or damaged items
- Anything that crowds the glass and hides the best pieces
Not sure where to begin? Our USS Boxer LHD 4 Challenge Coin is available in an enlisted version at $16.45 and an officer version at $16.45. Each is officially licensed by the Department of the Navy, and royalties support the Morale Wellness and Recreation (MWR) program for the Navy.
Step-by-Step: Planning and Assembling Your Shadow Box
Building the box is easier when you work in order. Follow these steps:
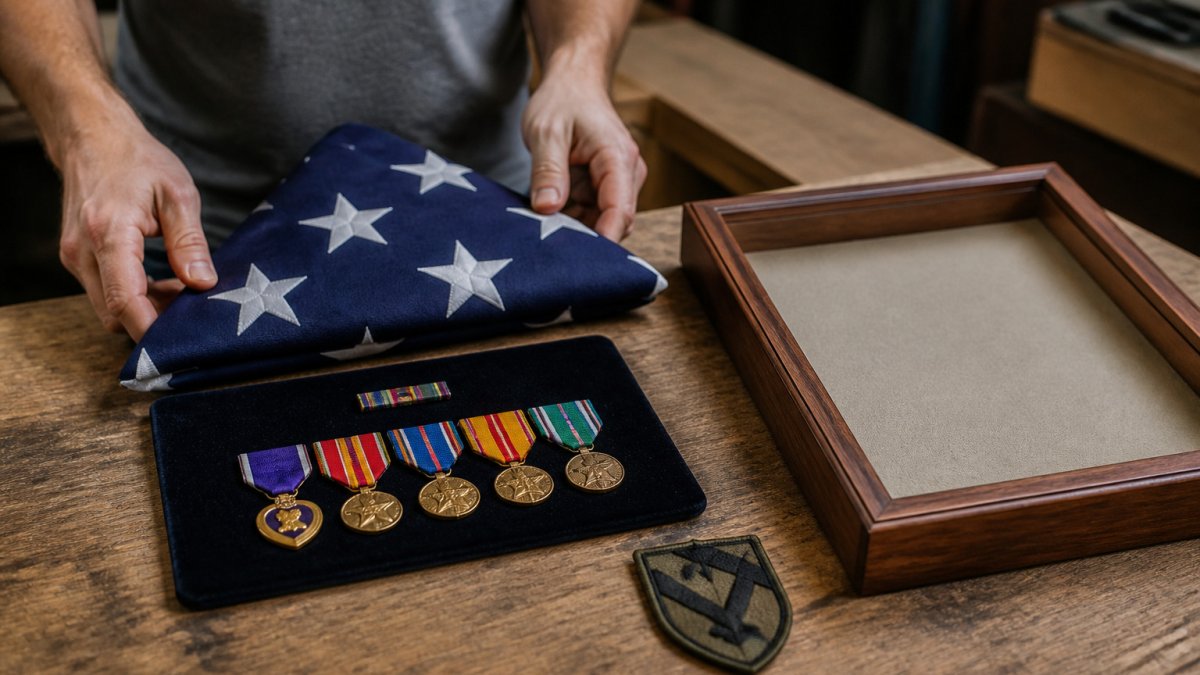
- Gather everything first. Lay out every item on a clean table and sort by type: medals, patches, coins, photos.
- Pick the centerpiece. Choose the one item that tells the main story, such as a flag, cap, or key medal.
- Sketch the layout. Use a sheet of paper cut to the case size and move paper cutouts until the arrangement feels balanced.
- Check sizes. Measure each item in inches and confirm the case is deep enough for raised items.
- Write the plaque text. Finalize wording before mounting so you know how much space it needs.
- Mount the backing. Use fabric or felt matching the branch colors, and attach flat items with stitching or acid-free supports.
- Place the centerpiece first. Fix the largest item, then add smaller pieces around it.
- Secure and seal. Close the case, check the glass for smudges, and hang it at eye level.
Expected result: A balanced, fully secured box that holds its arrangement when the case is moved or hung.
The assembly process breaks down into eight steps, each with a clear action and expected result.
| Step | What to do | Time or frequency |
|---|---|---|
| Gather everything first | Lay out and sort every item by type | Before planning |
| Pick the centerpiece | Choose the item that tells the main story | Before sketching |
| Sketch the layout | Move paper cutouts until balanced | Before mounting |
| Check sizes | Measure items in inches against case depth | Before writing plaque |
| Write the plaque text | Finalize wording and space it | Before mounting |
| Mount the backing | Attach fabric or felt matching branch colors | During assembly |
| Place the centerpiece first | Fix largest item, then add smaller pieces | During assembly |
| Secure and seal | Check glass for smudges and hang at eye level | Final step |
Military Shadow Box Layout Templates and Arrangement Tips
A layout works when the eye knows where to go first, second, and third. Before committing to a template, do the paper mock-up: cut a sheet to the exact interior dimensions of your case in inches, trace each item, cut out the shapes, and move them around until the arrangement reads clearly. This costs nothing and prevents the most common mistake, drilling or stitching a hole in the wrong spot.
Three rules apply to every template below:
- Leave 1 to 2 inches of breathing room between the case edge and the nearest item. Crowded boxes look smaller than they are.
- Cap the item count. Most well-balanced boxes hold 7 to 12 pieces. Beyond that, the centerpiece stops being the centerpiece.
- Respect ribbon precedence. When ribbons or medals appear in a row, order them highest to lowest, left to right, the way they are worn.
Template A: Centered Hero
Best for a single dominant item, a folded flag, a dress cap, or a shadow box flag display case.
- Centerpiece occupies the middle third of the case, horizontally and vertically.
- Medal or ribbon row sits 2 to 3 inches above the centerpiece, centered on the same vertical axis.
- Name plaque spans the bottom, roughly 1 inch above the lower edge.
This template suits a 16 x 20 inch case with 2 to 3 inches of interior depth. If your centerpiece is a folded flag, confirm the case depth clears the fold, a standard burial flag folds to roughly 11 x 22 inches and needs a case built for that footprint.
Template B: Timeline Row
Best for a career story with clear milestones.
- Divide the interior into three to five equal columns, one per milestone or duty station.
- Place the earliest item in the left column and the most recent in the right.
- Put a small photo or patch at the top of each column and the associated medal or coin beneath it.
Keep each column to two or three items. If a milestone has more than three meaningful pieces, split it into two columns rather than stacking.
USS Boxer LHD 4 Challenge Coin (Enlisted Version) →
Template C: Grid Display
Best for collections of small, similar items, challenge coins, patches, or ribbon racks.
- Choose a grid of 3 x 3, 4 x 3, or 4 x 4 cells, depending on item count.
- Keep cell spacing equal in both directions; uneven gaps are the first thing the eye catches.
- Place the single most important item in the center cell, not the top-left.
A 4 x 4 grid in a 20 x 20 inch case gives you roughly 4-inch cells with 1-inch gaps, a workable ratio for standard challenge coins and patches.
Choosing Between Templates
- One hero item and a handful of supporting pieces: Template A.
- A retirement gift telling a career story: Template B.
- A coin or patch collection: Template C.
Item-Selection Checklist
Run through this list before finalizing the layout:
- One centerpiece chosen and measured
- Medals and ribbons in precedence order
- Name plaque wording finalized and sized
If the checklist leaves you with more items than the template holds, rotate pieces seasonally rather than cramming them in, a shadow box is a display, not storage.
Writing a Military Shadow Box Plaque Wording That Honors Service
The plaque is where the story gets told in words. Keep it short, accurate, and respectful.
A simple formula works well:
[Rank] [Full Name] [Branch], [Years of Service] [One line about the service, such as a unit or career highlight]
Example:
Chief Petty Officer John Smith United States Navy, 1998 to 2024 Served aboard USS Boxer, LHD 4
Always confirm rank, dates, and unit names before ordering the plaque. A wrong detail is hard to correct after the box is assembled.
Budget, Preservation, and Mounting Tips for Long-Term Display
A shadow box is meant to outlast the occasion, so the materials and mounting method matter as much as the arrangement. The goal is simple: hold every item securely without altering it, and slow down the light, moisture, and chemical damage that degrade fabric, paper, and metal.
Mounting Without Damaging the Items
- Flat paper items (photos, certificates, letters): use acid-free photo corners or archival mounting strips. Avoid tape, glue, and rubber cement, all three stain and become permanent.
- Medals and ribbon racks: stitch through the existing suspension ring or pin with cotton thread to a fabric-covered backing board, or use clear archival strips rated for the weight. Do not sew through the ribbon itself.
- Patches: stitch at the edge with a few passes of matching thread, or use hook-and-loop if the patch already has it. Convert adhesive-backed patches to stitch mounting before display.
Light, Humidity, and Air
- UV light is the main cause of faded flags, ribbons, and photos. Keep the box out of direct sun and away from windows with strong afternoon light. In bright rooms, choose glass or acrylic with UV-filtering properties.
- Humidity above roughly 60 percent encourages mold and warping; below about 30 percent dries out leather and fabric. A stable indoor room is usually fine, avoid basements, garages, and bathrooms.
- Temperature swings cause condensation inside a sealed case. Hang the box on an interior wall rather than an exterior one.
Budget: What Drives the Cost
Costs vary widely by size, materials, and whether you build or buy, but the same factors drive the total in every case:
- Case size and depth. Larger and deeper cases cost more, and custom sizes cost more than standard ones.
- Glass versus acrylic. Glass resists scratching; acrylic is lighter and less likely to shatter. UV-filtering options add cost in either material.
- Backing material. Fabric-wrapped acid-free board costs more than plain board but protects the items.
A practical budgeting order is: case first, plaque second, mounting materials third, and any purchased memorabilia last. That sequence keeps the structural pieces funded before the decorative ones, and it lets you spread the cost over several months if needed.
Long-Term Care Schedule
- Monthly: dust the glass and frame with a dry microfiber cloth.
- Quarterly: check that the case is hanging level and the wall anchor is secure.
- Annually: inspect the seal, look for condensation or fading, and confirm no mounting strip has loosened.
Choosing Your Starting Pieces for a Custom Display
If you are starting from scratch, choose a centerpiece and a few supporting items. A Navy display might begin with a Navy retired flag from our catalog, along with a USS challenge coin and a name plaque.
Start small, check the fit, and build outward. A shadow box made with care, using pieces that truly belong to the service member, can become a family heirloom.
Frequently Asked Questions
What should you include in a military shadow box?
A strong military shadow box usually centers on the service member's most meaningful items: a folded flag, medals and ribbons, a rank insignia or unit patch, and one or two photographs. Challenge coins, a service branch emblem, or a name plate can round out the display. Choose items that tell one story rather than filling every gap. Before mounting, confirm each piece is authentic and in good condition, and keep documents such as discharge papers out of the frame unless you plan to display them. Measure each item first so the final layout fits the case size you choose.
How do you arrange items in a military shadow box?
Start with the largest item, usually the flag, and place it in the center or along the back panel. Position medals and ribbons in rows above or below it, grouped by precedence so the arrangement reads as orderly. Put the photograph near the top or on one side, and place the unit patch or insignia where the eye lands first. Lay everything out on a table before mounting, photograph the arrangement, and adjust until spacing looks balanced. Leave a little empty space around each piece so the display does not look crowded.
What should you write on a military shadow box plaque?
Keep plaque wording short and factual: the service member's full name, branch, rank, years of service, and a brief line of recognition such as Honorably served or Thank you for your service. Some families add a unit or ship name. Check spelling against official records before engraving, since corrections are costly. Avoid long paragraphs, which are hard to read on a small plate. A personal touch, such as a short tribute phrase chosen by the family, works well when it stays within two lines.
Can you put medals, ribbons, and a flag in the same shadow box?
Yes, and this is the most common combination for military display cases. The flag is typically placed at the back, medals and ribbons are mounted in the upper or middle section, and smaller items fill the remaining space. Make sure the case is deep enough for the folded flag and any medal mounts. Use archival-safe backing and avoid adhesives that can damage fabric. Keep the arrangement balanced so heavier items do not sit at the top where they might shift during shipping or wall mounting.
Ready to start? Browse our Navy Retired Flag, Us Army Retired Cap, and USS Nimitz CVN-68 Slate Plaque to begin your custom display.
