

How to Repair Tactical Gear Seams: A Step-by-Step Field Guide
Quick Summary
To repair tactical gear, first inspect the damage and match the method to it. Small rips in sound fabric suit hand sewing with a heavy-duty needle and bonded nylon thread, using a backstitch for strength. Load-bearing items need extra caution.
- Photograph the damage before you start so you can check whether the repair held.
- Use a heavy-duty needle, since standard needles bend or snap on multiple nylon layers.
- Choose bonded nylon thread, because cotton thread rots and breaks under strain.
- Use a backstitch for load-bearing seams, since it holds under tension better than a running stitch.
- Replace damaged webbing and do not sew over damaged protective plates or ballistic panels.
Table of Contents
- Assessing the Tear Before You Pick a Repair Method
- Tools, Materials and a Heavy-Duty Needle for Tactical Nylon
- How to Sew Tactical Nylon: Prep, Stitch and Secure
- Plate Carrier Repair: Safe Limits for Load-Bearing Gear
- Tactical Pants Seam Repair: Crotch, Knee and Pocket Seams
- Waterproof Seam Repair and Machine Troubleshooting
- Deciding Whether to Repair It Yourself or Send It Out
- Frequently Asked Questions
Assessing the Tear Before You Pick a Repair Method
Before you pick up a needle, look hard at the damage.
Start by answering three questions:
- Where is the damage? Is it a seam, the fabric panel, or a stress point like a pocket corner?
- How big is it? A small rip is under an inch. A larger tear or a seam that has come apart along its length needs more reinforcement.
- Is the item load-bearing? Plate carriers, slings, and harness straps carry weight. A failed stitch there is a safety problem, not just a cosmetic one.
A common mistake is treating a torn seam like a cosmetic flaw. Stitch a seam that has stretched or frayed at the stitch line, and the new thread will simply pull through the old, weakened fabric.
Use this quick guide to match the damage to a method:
| Damage | Best Starting Method | Why |
|---|---|---|
| Small rip, sound fabric | Hand sewing with reinforcement | Precise and strong on small areas |
| Seam split along its length | Machine sewing | Faster and more even stitch line |
| Thin or worn fabric around a hole | Patch, then sew | The patch spreads the load |
| Failed seam on a waterproof item | Seam tape or sealant after sewing | Restores water resistance |
Next, decide whether the gear is worth repairing yourself. A permanent repair may need a machine and skill you do not have. Department of Defense guidance on maintaining issued clothing and equipment can help you check the rules for issued gear before you change it.
We recommend photographing the damage before you start. The photo gives you a baseline, so you can check later whether the repair held.
Tools, Materials and a Heavy-Duty Needle for Tactical Nylon
Good tools make a repair faster and stronger. You do not need a full sewing studio to repair tactical gear. A small kit covers most field and home repairs.
Basic kit:
- A heavy-duty needle sized for thick fabric, such as a size 16 or 18 leather or denim needle
- High-tensile nylon thread, bonded if you can find it
- Sharp scissors or a seam ripper
- A thimble or leather palm guard
- Fabric chalk or a fine marker
- Safety pins or clips to hold layers together
- Optional: a fusible nylon patch and a seam sealant for waterproof items
Choose the needle first. A standard needle bends or snaps when it hits multiple layers of nylon.
Thread matters just as much. Cotton thread rots and breaks under strain. Use nylon or polyester thread labeled for outdoor or heavy-duty use. Bonded nylon resists fraying and holds up in wet conditions.
Here is how to match materials to the job:
| Material | Recommended Choice | Avoid |
|---|---|---|
| Tactical nylon | Heavy-duty needle, bonded nylon thread | Standard needle, cotton thread |
| Waterproof fabric | Seam tape, sealant, nylon thread | Untreated thread alone |
| Thin nylon patch | Fusible nylon patch | Cloth glue |
A common mistake is buying thread that looks strong but is actually cotton-wrapped polyester. Check the label. The thread should say nylon, bonded, or heavy-duty.
For field repairs, pack a small repair kit with a few needles, nylon thread, and a patch. A roll of heavy-duty tape guidance from the U.S. Army Natick Soldier Systems Center shows how military field teams approach quick fixes, though you should still test any tape on your gear before relying on it.
How to Sew Tactical Nylon: Prep, Stitch and Secure
Sewing nylon is different from sewing cotton.
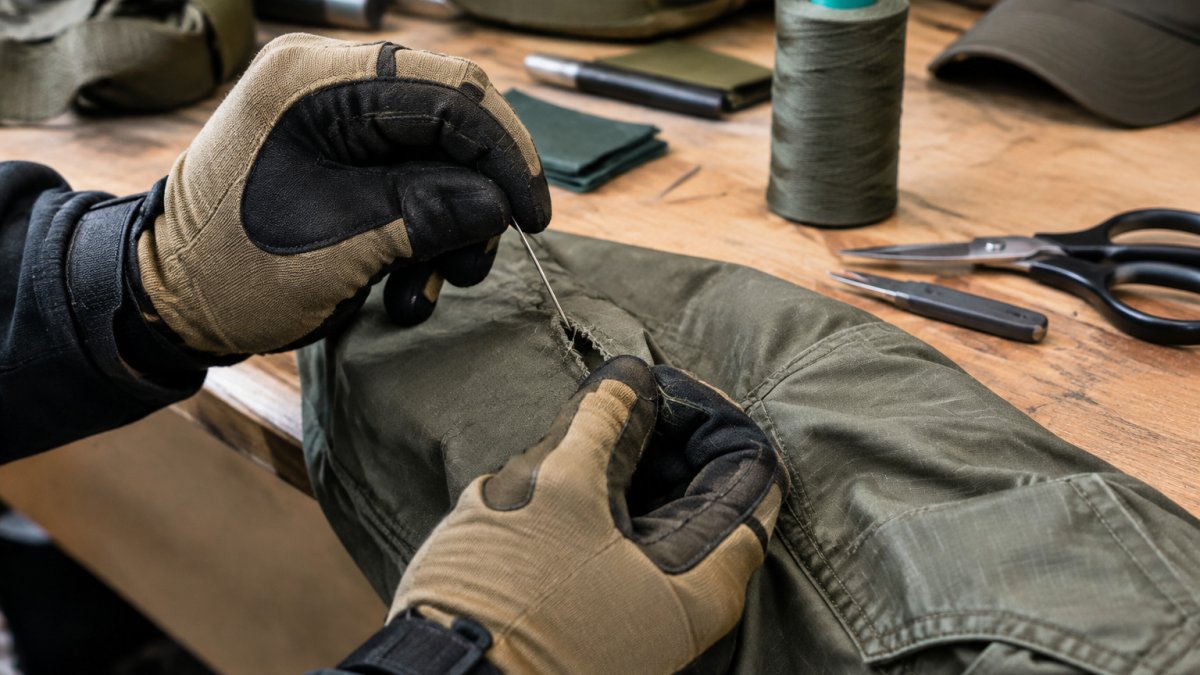
Step 1: Prep the area. Turn the gear inside out so you can see the seam from the back.
Step 2: Hold the layers together. Use clips or safety pins to keep the torn edges aligned.
Step 3: Choose a stitch. Different stitches suit different loads:
- Backstitch: The strongest hand stitch for seams. Each stitch overlaps the last, so the line does not unravel easily.
- Running stitch: Fast, but weaker. Use it only on light, low-stress areas.
- Catch stitch: Good for hemming and for holding a patch flat.
For load-bearing seams, use the backstitch. It holds under tension better than a simple running stitch.
Step 4: Sew the seam. Start about half an inch before the damage, so the stitch line runs onto sound fabric.
Step 5: Secure the thread. At the end, sew two or three backstitches in the same hole. Then tie a knot with a small loop and pull it through to the inside. Trim the tail. A secure knot keeps the repair from unraveling.
Work slowly on the first few stitches. Once you have a steady rhythm, the repair goes quickly.
Plate Carrier Repair: Safe Limits for Load-Bearing Gear
A plate carrier holds protective plates, and its seams and straps carry real weight. Repairing it calls for more caution than repairing a pant leg.
Think about what the seam does. A stitch on a plate pocket, a strap, or a load-bearing attachment point holds the plate in place. If that stitch fails under load, the plate can shift or drop.
Keep these limits in mind:
- Do not patch or sew over damage to protective plates or ballistic panels. Those materials are designed to be replaced, not sewn. A repaired panel may not perform as tested.
- Replace webbing that shows fraying, cuts, or heat damage. Sewing new stitches into weak webbing does not restore its strength.
- Do not add reinforcement that changes how the plate sits or how the carrier fits.
- Reinforce stitch lines on strap anchor points with bar tacks or multiple rows of backstitching.
If a plate carrier has damage to a strap, buckle, or attachment point, stop using it for load-bearing tasks until it has been inspected. Check your unit's or agency's requirements before you repair issued equipment. NIOSH guidance on personal protective equipment inspection and maintenance offers general principles for inspecting protective gear for wear and damage.
A common mistake is assuming that a strong repair restores full rated strength. A hand repair rarely matches factory construction. Treat it as a temporary or training-use fix unless the manufacturer or your unit approves it for load-bearing use.
Tactical Pants Seam Repair: Crotch, Knee and Pocket Seams
Tactical pants take a beating in three places: the crotch, the knees, and the pockets. Each one fails in its own way, so each needs its own approach.
Crotch seams carry the most stress when you squat, climb, or kneel. The stitch line runs under tension every time you move.
Knee seams often wear through the fabric itself, not just the stitching.
Pocket seams take repeated pulls from gear loaded into the pocket. Reinforce the top corners, where the most stress lands.
Here is a quick guide to the three areas:
| Area | Main Stress | Repair Approach |
|---|---|---|
| Crotch | Constant tension when moving | Double row of backstitch from inside |
| Knee | Abrasion and thin fabric | Sew, then add an inside patch |
| Repeated pulling and load | Reinforce corners with bar tacks |
Check that the repaired pants still move freely. A seam pulled too tight limits movement and can tear again under stress.
Waterproof Seam Repair and Machine Troubleshooting
Waterproof gear needs two steps: a strong stitch and a seal. Sewing alone makes a set of holes, and water gets through every hole a needle leaves behind. This is the part most repair guides skip.
Restoring waterproofing:
- Sew the seam with nylon thread and a backstitch.
- Apply seam tape over the stitch line on the inside. Press it down with a warm iron if the tape is heat-activated.
- If you do not have seam tape, use a seam sealant made for your fabric. Apply a thin, even bead along the stitches and let it cure fully before use.
- Test the seal with water. Lightly spray the area or run it under a faucet, then check the inside for leaks.
A common mistake is sealing a seam before the stitches are secure. Make sure the stitch line is tight and finished before you add tape or sealant.
Machine troubleshooting:
If you sew on a home machine, nylon can cause problems. Use these fixes:
- Skipped stitches: The needle is probably too small or dull. Switch to a heavy-duty needle.
- Thread breaking: Lower the tension, and check that the thread is nylon or polyester and not cotton.
- Fabric puckering: Use a longer stitch length and a walking foot if your machine has one.
- Needle breaking: Slow down. Force from fast sewing through thick layers snaps needles.
Test every machine setting on a scrap piece of the same nylon before you sew the actual gear. A test piece costs nothing and prevents a ruined repair.
Deciding Whether to Repair It Yourself or Send It Out
Some repairs are worth doing yourself. Others belong with a professional. Use these guidelines to decide.
Repair it yourself when:
- The damage is a small rip or a loose seam on non-load-bearing gear
- You have the right needle, thread, and a steady hand
- The item has low replacement value, and a field fix is good enough
Send it out when:
- The damage is on a load-bearing strap, harness, or plate carrier attachment
- The waterproof layer is damaged across a large area
- The gear has a warranty that a repair could void
- The seam is long, and you do not have a machine that handles thick nylon
Weigh the cost of a repair against the cost of a replacement.
For professional-grade gear, a trained repair shop may be able to restore the original construction more closely than a home repair.
Whichever route you choose, inspect the repair after the first few uses. Look for loose threads, new tears, and seal failures.
Keep your gear in good shape between repairs with regular checks. If you are shopping for durable military-themed apparel, you can browse the range at US Troop Gear, Inc. (explore durable military apparel).
Ready to find gear built to last? Browse the full range at US Troop Gear, Inc. for branch-specific apparel built for real wear. Continue shopping today.
Frequently Asked Questions
How do you repair a torn seam on a plate carrier?
Start by removing the carrier's inserts and checking that the torn seam does not cut into the load-bearing webbing or the plate pockets. For a clean tear, flatten the fabric, pin the edges together and sew a reinforced backstitch with heavy-duty nylon thread, stitching at least half an inch past each end of the damage. Overlap the seam with a nylon patch on the inside if the fabric is frayed. If the stitching is cut through on webbing or MOLLE attachment points, stop and have the carrier inspected before returning it to use.
What thread should you use to repair tactical nylon?
Use a bonded nylon or high-tensile polyester thread rated for heavy-duty outdoor use, often labeled as V69 or V92 in bonded nylon. Avoid cotton thread, which rots and breaks down when exposed to moisture and UV light. Pair the thread with a heavy-duty or leather needle sized for the fabric weight, typically a size 16 to 18. Match the thread color to the gear where possible, or choose a dark shade so the repair blends in.
Can you sew a ripped seam by hand?
Yes. Hand sewing works well for small rips and seam separations, especially in the field. Use a saddle or backstitch rather than a simple running stitch, because a running stitch can pull apart under load. Work two rows of stitching where the seam carries weight, and secure each end with several tight half hitches or a surgeon's knot. Hand repairs are durable for light and moderate use, but a machine-sewn seam is usually stronger on high-stress areas.
How do you repair a waterproof seam on outdoor gear?
Sew the seam back together first, then seal the stitch line with a seam sealer or seam tape rated for the fabric. Clean the area with isopropyl alcohol, let it dry fully, and apply the sealer in a thin, even layer that covers the needle holes. Allow the sealer to cure for the time listed on the product label, usually 24 hours, before exposing the seam to water. Test the repair by pressing a damp paper towel against the inside of the seam.
