

How to Test Gear Abrasion Resistance at Home or in a Lab
Quick Summary
Abrasion resistance is how well a riding garment holds up when it slides across pavement, measured by how long a material lasts before a hole forms during a slide. To test it, prepare a specimen at least 2 inches beyond the clamp line, mount it without slack, set a defined abrasive surface, speed and force, then record the time to failure across at least three specimens.
- Cut specimens at least 2 inches (about 50 mm) beyond the clamped area so grips do not pull fibers.
- Mount the sample without slack, since loose fabric gives unreliable abrasion results.
- Run one variable at a time and never change speed or force midway through a run.
- Test at least three specimens and report the mean and range, not a single number.
- Use an accredited lab for product labels or legal claims; in-house tests suit internal comparisons.
Table of Contents
- What Abrasion Resistance Means for Motorcycle Gear
- Motorcycle Gear Testing Standards and How They Compare
- Step-by-Step: How to Test Motorcycle Jacket Abrasion Resistance
- How MotoCAP Testing Fits Into Abrasion Ratings
- Reading Results: What AAA Rated Motorcycle Gear Means
- Test Limits and Real-World Crash Conditions
- Choosing Your Next Step for Trusted Riding Gear
- Frequently Asked Questions
What Abrasion Resistance Means for Motorcycle Gear
Last Updated: November 9, 2026
Abrasion resistance is how well a riding garment holds up when it slides across pavement.
Abrasion resistance is the ability of a fabric or leather to resist wearing away when rubbed against a rough surface.
Why does this matter? In a low-speed fall, a rider may slide along the road for a distance. The outer layer of the garment takes that friction.
- Outer shell: the first layer to touch the road
- Impact zones: shoulders, elbows, hips and knees, where wear is most likely
- Seams and panels: points where weak construction can fail early
Abrasion is only one part of protection. A garment can score well on this test and still have weak impact padding or poor fit. Keep that in mind as you read the rest of this guide.
Motorcycle Gear Testing Standards and How They Compare
Several test methods are used to rate motorcycle garments. Each one works a little differently, so results are not always directly comparable.
A common approach is to test a specimen against a moving abrasive surface at a set speed and force. The result is the time or distance before the material fails. Some standards also rate impact protection or seam strength in the same document.
Here is a simple way to compare the main approaches:
| Test or standard | What it measures | Best used to |
|---|---|---|
| EN 17092 (European) | Abrasion, impact and seam performance | Compare garment classes against a common scale |
| MotoCAP | Abrasion and impact on complete garments | See how a finished jacket or pant performs |
| Lab abrasion test (generic) | Time to failure on a fabric sample | Compare materials before a garment is made |
When you read a rating, check which standard produced it. A "AAA" result under one method may not mean the same thing under another.
Step-by-Step: How to Test Motorcycle Jacket Abrasion Resistance
Most ranking pages describe abrasion testing in the abstract. This section gives you a reproducible, numbered procedure you can follow with common lab equipment or replicate mentally when you read a test report. It is a general method, not a certified lab protocol. For a rating you can rely on, use an accredited laboratory.
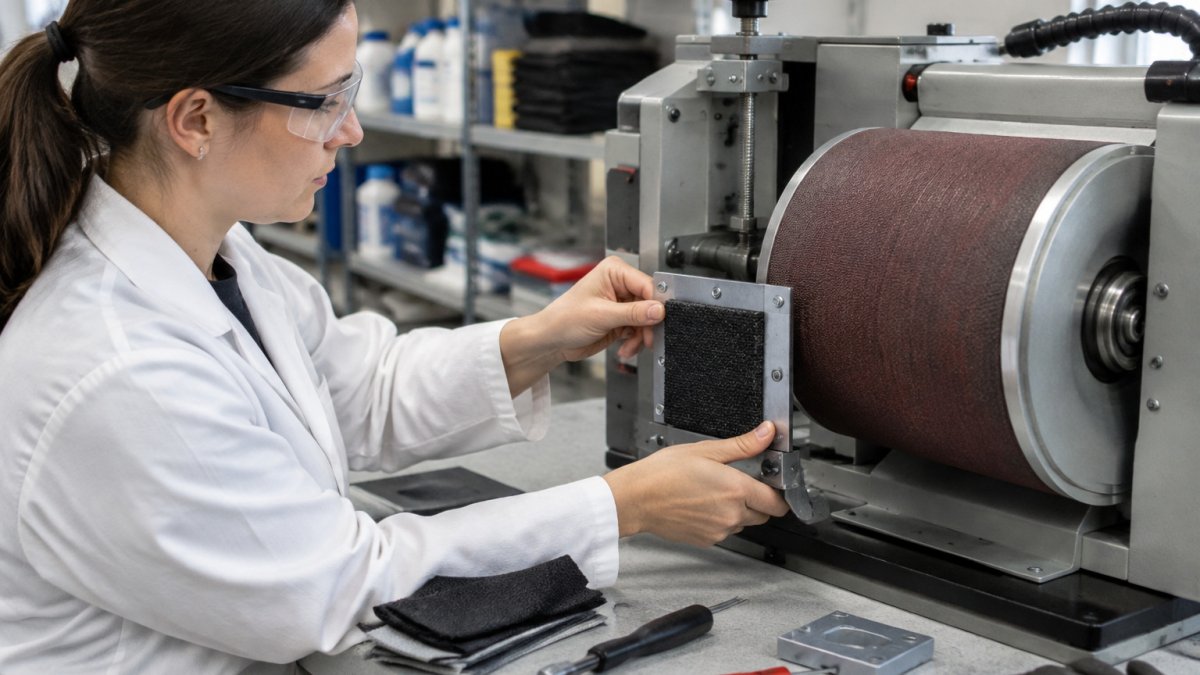
1. Define What You Are Testing and Why
Decide up front whether you are testing a flat material sample, a seam, or a complete garment zone. The answer changes the fixture, the specimen size, and the failure criteria. Write down the material type, weight (in ounces per square yard or grams per square meter), finish, and color before you cut anything. A common pattern is that two fabrics with the same trade name perform differently because of backing, coating, or dye lot.
2. Prepare the Specimen
Cut a square sample large enough to clamp firmly on all four sides, typically at least 2 inches (about 50 mm) beyond the clamped area on each side so the grips do not pull fibers from the test zone. Keep the sample flat and free of wrinkles. If you are testing a laminated or lined panel, decide whether the liner stays attached and record that choice.
- Mark the outward-facing side so orientation is unambiguous
- Avoid cutting through existing stitch holes or damaged areas
- Condition the sample at room temperature and moderate humidity before testing
- Label each specimen with a unique ID
Watch out: A specimen cut too close to the clamp line will fail at the grip instead of in the abrasion zone, giving you a false low result.
3. Mount the Specimen Without Slack
Clamp the sample so it cannot shift, bunch, or stretch during the run. A loose sample gives unreliable results because the abrasive surface grabs fabric instead of abrading it evenly. Check that the exposed test area is flat and that the clamps are tightened to the same torque on every run.
4. Set the Abrasive Surface, Speed, and Force
Set the test speed and applied force to match the standard you are following. Changing either one changes the result, so record every setting in a log.
- Choose the abrasive surface specified by your method (grit, backing, and condition matter)
- Set the rotation or travel speed and confirm it with a tachometer or timer
- Apply the defined force or drop height and verify it with a calibrated load cell or scale
- Confirm the abrasive surface is fresh or within its specified wear limit
Run one variable at a time. Do not change speed or force midway through a run.
5. Start the Test and Watch for Failure
Start the abrasive motion and time the run. Stop the test when a hole forms through the material or when the method's defined failure criterion is met, some methods define failure as a hole of a specific diameter, others as the first visible breakthrough. Record the exact time or number of cycles at that point.
- Note the failure mode: hole, thinning, seam separation, or coating wear-through
- Photograph the failed specimen next to a scale
- Repeat the test on at least three specimens for a fair result
A single run can be misleading. Several runs give you a better picture of variability.
6. Calculate and Report
Report the mean and range of your results, not just one number. State the standard or method you followed, the settings used, the specimen count, and the failure criterion. A result without those details cannot be compared to anyone else's data.
7. Know When to Use an Accredited Lab
If you need a rating for a product label, a retailer, or a legal claim, use an accredited laboratory. Look for a lab that participates in proficiency testing for abrasion methods and can show calibration records for its load cells, speed controls, and abrasive surface conditioning. For internal material comparisons, a consistent in-house setup is fine as long as you document it.
How MotoCAP Testing Fits Into Abrasion Ratings
MotoCAP is a rating system that tests finished garments rather than only fabric samples. It is useful because it reflects how a complete jacket or pair of pants performs, including seams and protective zones.
Many riders search for "motorcycle gear testing" and find MotoCAP results alongside other standards. Treat it as one source among several, and compare results only within the same test framework.
Reading Results: What AAA Rated Motorcycle Gear Means
A rating like AAA usually means the garment scored at the top of its scale under the testing method used. Ratings are often grouped by letter, with AAA as the highest and lower letters indicating less performance. But the letter alone tells you less than the underlying numbers. Here is how to read a result like a practitioner.
What the Numbers Actually Measure
Abrasion test results are usually reported as time to failure, distance traveled before failure, or number of cycles to failure at a defined force and speed. A longer time or greater distance means the material resisted wear longer under those exact conditions. Force matters because a higher applied load accelerates wear; a result at one force is not directly comparable to a result at another. Hole formation is the common failure criterion, but some methods also record thinning or coating wear-through before a hole appears.
How to Compare Results Fairly
Compare only results produced under the same method, same abrasive surface, same force, and same failure criterion. A common pattern is that two garments both labeled AAA were tested under the same standard but with different specimen preparation or seam treatment, so the letters match while the underlying performance does not.
- Check which standard produced the rating
- Look at which zones were tested and whether seams were included
- Compare the same test type across brands, not across methods
- Ask for the raw time or distance data when it is available
What a High Rating Does and Does Not Promise
A top rating shows strong abrasion performance under controlled test conditions. It does not guarantee how a crash will go. Impact force, slide angle, road surface, garment fit, and seam construction all change the outcome in ways a flat-specimen test cannot capture.
- Lab tests use one surface and one set of conditions
- A garment fitted poorly may slide or bunch in a crash
- Worn or damaged gear performs below its rating
- Seams and zippers can fail even when the panel holds
A Practical Interpretation Checklist
When you see a rating, ask four questions: Which standard? Which zones? Were seams tested? What was the failure criterion? If you cannot answer those, treat the rating as a starting point rather than a verdict. Use it to narrow your choices, then look at construction, fit, and impact protection before you buy.
Test Limits and Real-World Crash Conditions
Lab tests are controlled. Real crashes are not. The speed, angle, surface and duration of a slide all change the outcome.
A few limits are worth knowing:
- Lab tests use one surface and one set of conditions
- A garment fitted poorly may slide or bunch in a crash
- Worn or damaged gear performs below its rating
- Seams and zippers can fail even when the panel holds
Use the rating as a guide for choosing better gear, not as a promise. Wear a helmet and certified protection every time you ride.
Choosing Your Next Step for Trusted Riding Gear
If you are ready to pick gear, start by checking the test standard and the protected zones. Look for clear information on materials, construction and fit before you buy. Checking abrasion resistance alongside the test standard and protected zones helps make material and fit comparisons more meaningful, while Chief Miller Apparel connects uniform durability to the same practical choices.
Explore our current collection of military-inspired clothing and see which pieces suit your riding needs. For a closer look at what separates protective gear from civilian options, read our guide to military clothing and civilian outdoor gear. When you want to know what makes professional-grade gear worth the investment, see why professional grade tactical gear matters.
Frequently Asked Questions
How do you test for abrasion resistance?
Abrasion resistance is tested by mounting a fabric specimen and rubbing or dropping it against a standardized abrasive surface under a set force and speed. The test runs until the material wears through or forms a hole, and the elapsed time or number of cycles is recorded. Labs compare that result against the thresholds in the test standard to assign a performance level. The same basic logic applies whether the sample is leather or textile, though the expected results differ by material.
What do motorcycle gear abrasion ratings mean?
Motorcycle garment ratings such as AAA, AA, A, B, and C summarize how long a garment's material and construction resisted abrasion in a standardized lab test. A higher rating indicates longer time to failure under the test conditions. A rating reflects laboratory performance on a specimen, not a guarantee of how the gear will perform in an actual crash. Check which standard the rating was derived from before comparing products.
Can you test motorcycle gear abrasion resistance at home?
A basic home check can show whether a material is noticeably weaker than another, but it cannot replicate a standardized laboratory test. Home methods usually rely on rubbing a sample against a rough surface and comparing wear, which is not repeatable enough to produce a rating. For a result you can compare against published standards, a certified test lab using the correct specimen size, abrasive, and force is required.
What is good abrasion resistance for motorcycle clothing?
Good abrasion resistance depends on the impact zone and riding use, but riders commonly look for the highest protective ratings in the shoulders, elbows, hips, and knees where contact with pavement is most likely. Higher-rated materials generally last longer before wearing through in a slide. Compare ratings within the same standard, and remember that seams and fastenings also need attention.
